Sunday, January 24, 2010

MIA for now! Just this week, I promise!

Hi everyone!

So last week I managed to get 4 out of my 5 blog posts up for the week (I post 3 days/wk on this blog & 2 days/wk on my other blog).

It was the first time I missed a scheduled blog & I was quite dissapointed about it, however I have a bunch of things to catch up on & I realized that I'll have to miss a few posts in order to catch up. Then I'll be blogging away again just as I have been for the last few weeks :)

I really find this blog motivating & since I have just lost someone in my life who really meant a lot to me, I will just be putting my energy into positive activities & goals even more.

Remember - if you're having a bad day, week, month, or even year, just put on your rose coloured glasses & start to see everything in a new light. Its hard but totally worth it :)

See you next week!

Friday, January 22, 2010

Recipe of the week ~ Lentil-Walnut Burgers (optional: with Yogurt-Cilantro Sauce)

I found the recipe here. It includes the photo with ingredients & instructions. My personal notes are at the bottom with additonal & substitution ideas.


Ingredients:

Lentil-Walnut Burgers:

3/4 cup toasted walnuts, cooled

1/3 cup plain dried breadcrumbs

3 garlic cloves, coarsely chopped

2 teaspoons ground cumin

2 teaspoons ground coriander

1/4 to 1/2 teaspoon red-pepper flakes

Coarse salt and ground pepper

3/4 cup lentils, cooked, drained, and cooled

4 tablespoons olive oil

1 large egg (I'm not sure what can substitute this. It is used to make the mix stick together in order to form patties)

Yogurt-Cilantro Sauce:

3/4 cup plain low-fat yogurt (I think soy yogurt will work well with this)

Coarse salt and ground pepper

2 tablespoons chopped fresh cilantro leaves

1 tablespoon fresh lemon juice


Instructions:

Lentil-Walnut Burgers:

In a food processor, combine walnuts, breadcrumbs, garlic, cumin, coriander, pepper flakes, 1 1/2 teaspoons salt, and 1/4 teaspoon pepper; process until finely ground. Add lentils and 1 tablespoon oil; pulse until coarsely chopped (some lentils should remain whole).

In a large bowl, whisk egg. Add lentil mixture; mix well. Divide into 4 equal-size parts; roll into balls, and flatten with the palm of your hand into 3/4-inch-thick patties.

Heat remaining 3 tablespoons oil in a large nonstick skillet. Add burgers; cook over medium-low heat until crisp and browned, turning gently with a thin-edged spatula, 8 to 10 minutes per side. Transfer to a paper-towel-lined plate to drain.

Per serving (without sauce): 460 calories; 28.9 grams fat; 18.7 grams protein; 35 grams carbohydrates; 13.6 grams fiber

Yogurt Cilantro Sauce:

In a small bowl, whisk together yogurt, cilantro, and lemon; season with salt and pepper. Serves 4

Prep time: 40 minutes Total time: 40 minutes


My Notes:

- I added a small amount of flax seeds to the food processor.

- I added a small amount of flax seeds, finely chopped green pepper and finely chopped mushroom to the sauce. Add to your own discretion.

- Easy on the salt..the cilantro is really strong!- If you can't find corinander, use cilantro as an excellent substitution. I ended up putting a little extra cilantro in the sauce.

- You can replace the yogurt with vegan sour cream.

- If you would like to use an egg replacement: 1 tbsp ground flax seeds + 3 tbsp water, whisked together. It seems to have worked really well. I had no problem shaping the burger and it also kept its shape quite nicely.

Wednesday, January 20, 2010

Salt Water Rinse

I used to use Listerine Mouthwash every evening after brushing & flossing my teeth. It stung, but made my mouth feel fresh.

During my last visit to the dentist, I was told that I still have mild gingivitis (yuck). It doesn't seem to matter what I do, I still have it! I brush twice per day, floss once per day & rinse once per day!

I asked the dental hygenist if she thought that mouthwash was good, & she told me it helps a little. In fact, if you use it too much (I think she meant more than once a day), it can dry out your tooth pockets (or was it sockets?) & cause an environment for bacteria to thrive in. What is better than mouthwash is salt water rinse (ew ew ew). Funnily enough, in the very room that she was telling me this, there was a bottle of Listerine on the table beside us (haha..I guess it's ok to use at the dentist!).

So I looked up salt water rinse recipes (I know, its obvious!) & it turns out that this is all you need to do:

Dissolve 1 Teaspoon Salt in 1 Cup Warm Water (stir if necessary).


I've been doing it daily now for a few days & have gotten used to the taste & my mouth definitely feels cleaner. The water will look a little cloudy / whitish (see picture above with salt water in cup).

So there you are; a very inexpensive (as you can see in the picture, that entire box of salt only costed me $1.29!) & healthy way to rinse your mouth!

Monday, January 18, 2010

Product Review ~ Bioré Deep Cleansing Pore Strips

In the last few months, I started to experience the worst acne of my entire life (including my teen years). I couldn't understand what the problem was. I was using a new cleanser in the evenings but I thought it wasn't working at all on my skin. I soon realized the opposite: the cleanser was overworking my skin to the point that I had an explosion of acne that I had never before experienced. My face literally hurt from the acne.

Last week I decided to start using some new skin products to help turn my unfortunate situation around. One of the products I purchased was a box of Bioré Deep Cleansing Pore Strips.


The next two pics are really pore quality (haha..get it?). Anyway, this is the shape of the nose strip:


Below is a pic of (eek!) my nose with a strip on it. It's really easy to put on (instructions can be found in link above). If you look at the skin around my nose, you can see how it is discoloured & reddish. That's when my acne was pretty much at it's worst. I cropped the rest of my face out because the acne was just that bad.


The Result:


It works!! Out of all the products I used, the first place that pimples started to disappear from was my nose. You can see (& touch) all the dirt & oil that comes out of your pores.

I was so eager that I was using the strips daily. It is not necessary to use daily. I would use weekly as instructed on the box, or you will be wasting strips (they take out so much dirt that there is little to nothing left to remove for several days).

So I totally recommend this product. Next time, I will be purchasing the nose and forehead strips.

Note!!: I have finally found a skin care routine that is working for my skin so I'm going to post all of my skin care steps soon! It has made such a huge difference that I think I should share more than just my positive review of the nose strips. I'll probably get that post up soon!

Friday, January 15, 2010

Recipe of the week ~ Vegetarian Cannelloni

This recipe is healthy & delicious! Sorry I do not have a photo of it just yet, but it looks pretty much like this & this when cooked.

Ingredients

1 Pkg (475 g) Ricotta Cheese

1 Pkg (300 g) Frozen Chopped Spinach, thawed & well drained

1 Egg

1 Cup (250 ml) Primo 100% Grated Parmesan Cheese, divided

1 Tsp (5 ml) Dried Basil

1/2 Tsp (2 ml) Salt

1/4 Tsp (1 ml) Pepper

20-24 Primo Oven Ready Cannelloni

1 Can (680 ml) Primo Thick & Zesty Original Pasta Sauce

Directions

1. In medium bowl, combine ricotta cheese, spinach, egg, 1/2 cup (125 ml) Primo Parmesan cheese, basil, salt & pepper. Mix well.

2. Fill cannelloni with spinach mixture.

3. Spread 1/2 cup (125 ml) pasta sauce on bottom of 13 x 9 x 2" (33 x 23 x 5 cm) baking pan.

4. Arrange stuffed cannelloni in single layer & cover with remaining sauce, making sure to cover all pasta.

5. Sprinkle with remaining Parmesan cheese.

6. Cover with foil & bake at 350 F (180 C) for 45 minutes or until tender.

Makes 6-8 servings.

Preparation time: 25 minutes.


My Notes

-The bottom of the cannelloni tends to get dry so I think more than 1/2 cup sauce is a good idea.

- My other idea is to spray some oil on the bottom of the pan, which I havent tried yet but will definitely try next time.

- Sometimes the top of the cannelonni will be a little watery after the baking time, so to avoid this, check it periodically & if needed take off the foil toward the end of the baking time so the water can evaporate more quickly.

- If you like mozzerella cheese better than ricotta, you can use less ricotta & substitute that amount with mozzerella.

Wednesday, January 13, 2010

10 things about me

I was tagged by Kay* of Ice Cream & Peonies to reveal 10 things about myself & then tag 7 other people. Now, I don't have 7 followers (don't laugh too hard, but I am one of my own followers!) but I will tag all of my other followers & that will leave 2 other bloggers. I will choose 2 bloggers that I follow & notify them on their blogs. So lets go!


1. My family is from Terçiera, Portugal in the Azores. I have been there 4 times in my life, but I have never set foot on the mainland (something I will do some day).

An areal view of the Island
2. When my sister & I were younger, we were asked to be on Tiny Talent Time to play piano but we were too shy & didn't do it. I did, however, win an award at a piano concert for being a good student!

My sister & I in front of our piano (I'm the little one)

3. I love camping. It's in my blood. I haven't camped in 2 summers & it just kills me.

The sunset at Oastler Lake Provincial Park

4. I'm 29 years old & have no idea how that happened. My boyfriend, on the other hand is a whopping 4 years younger than me! (I used to scoff at dating guys even 6 months younger than me).

LOL..bf hiding behind a Jar Jar Binks frisbee after we carved our Halloween pumpkin

5. I work at a University, in Copyright. I enjoy it but don't see myself doing that for too much longer.

6. I never finished my Bachelor of Arts in Sociology. I just started taking classes toward completing it & I am sooo excited.

Some Geese at the place where I work & study. I practically live here!

7. I'm afraid of the dark. I live alone so unless someone is sleeping over, I always leave my bedside lamp on (the light is annoying but it's better than being scared).

8. I'm borderline obsessed with mixing nail polish colours to make new & more exciting colours. It's a very hit & miss hobby. This is my latest creation. At first I hated it but now I feel lukewarm toward it.

The polish has started to chip off a bit..

9. I'm a perfectionist / procrastinator. If something isn't perfect, I tend to let it fall apart. This explains why my condo is either meticulously clean & tidy or looks like the aftermath of a hurricane. I'm trying to become more balanced :)

10. I'm hyper self-aware. This can be a complete curse or a total blessing. I usually feel like it's a curse but if I could change it, I don't think I would.

I hope you enjoyed the 10 random things about me!

Now I would like to tag: 1. Sami of A Mommy's Story 2. Queen Bee of Lyfe of a Queen Bee 3. Christine of Skinny Girl Trapped in a Big Girl's Body 4. yummymomma08 of The New Adventures of Mommyhood 5. Sarah-Lyn of i bake cupcakes 6. Lauren of Pure Style Home 7. Joanna of ~ Chandelier No. 4 ~

Monday, January 11, 2010

Aloe Vera Juice & a little about me

One of the first pieces of advice that my father gave to me when I told him that I was really sick was to start drinking Aloe Vera juice every day. My father has ulcerative colitis; a form of IBD (inflammatory bowel disease). He was diagnosed around 5 years ago & was prescribed a lot of pills. In an attempt to help my dad in any way, my mother read some alternative medicine books to see what they had to say about colitis. At least one of the books suggested Aloe Vera juice because of it's natural healing properties.

Before my father started drinking it, he asked his specialist what he thought. His specialist said "Yes, its very good. One of my patients was almost cured from it." Almost cured. Wow. Now, the medical community has not found any cure for IBD, so this is a big statement.

So ever since, my father takes a shotglass full of Aloe Vera Juice every morning & he swears it has made a difference.

Where I come in:

My life changed in January of 2009. I had always experienced many health issues growing up, but never anything really major. It seemed normal to me to feel the way I did. It didn't seem normal to everyone else. Well, in January of 2009 I got sick. Really sick. I thought to myself - ok there's something going on here...this isn't normal. I looked up some of my symptoms online & BANG. There they were in front of my face. Every symptom led to 3 things: Crohn's Disease, Colitis & Celiac Disease. It never occured to me that I could have what other members of my family had (1 has Crohn's, 3 have Colitis).

So I went to the doctor & pushed for tests. They found stuff. Scary stuff. So far: a hyatial hernia, an ulcer, acid reflux disease & I honestly forget the other thing... (who would want to remember?). I have all the symptoms of Crohn's Disease, but it seems that the specialists in this city are rather busy (grr). I also have recurring eye infections, other recurring infections or ailments & I am always using up my sick days from work.

Now my life isn't horrible, but it takes more "fight" in me to get through the day without any sort of medication (besides Prevacid).

Anyway, the bottom line is that while I'm working toward getting healthy, I'm making a commitment to taking a shot of Aloe Vera Juice every day.

The Juice:

Aloex Aloe Vera Juice is the juice that my parents introduced me to. My mom bought it in the health section of the Superstore. I'm sure you can find different brands in health stores as well as the health section of any grocery store. You might even find it in pharmacies. I'm positive that it's amazingly healthy for everyone to drink but if you're not sure, check with your doctor first.


The Taste

I won't lie, it's gross. Thats all I can say. It tastes a bit like what you might imagine paint thinner to taste like. But you get used to it. Sorry for the bad news. Try different flavours & see what you might prefer :P

Thanks for reading my story!

If anyone is interested, here is the Crohn's & Colitis Foundation of Canada Website

Friday, January 8, 2010

Recipe of the week ~ Asian Chicken and Rice Wraps

Oh my goodness, my boyfriend LOVED these wraps. In fact, it is the first meal I ever made for him (cue the "aww") heehee.

The full recipe & info can be found at the knorr website.

Ingredients

1 pkg Knorr Sides Plus Vegetable Fried Rice 1 pkg

30 mL olive oil 2 tbsp

5 mL minced garlic 1 tsp

5 mL minced ginger 1 tsp

500 g boneless skinless chicken breast, cut into 1/2-inch (1 cm) strips 1 lb

10 mL Bovril Liquid Chicken Bouillon 2 tsp

30 mL chopped green onions 2 tbsp

50 mL hot water ¼ cup

250 mL shredded napa cabbage (optional) 1 cup

250 mL shredded carrots 1 cup

250 mL sliced bell peppers 1 cup

2 mL hot chili sauce or red pepper flakes ½ tsp

20 mL hoisin sauce 4 tsp

4 large flour tortillas 4


Directions

Prepare Knorr Sides Plus Vegetable Fried Rice according to package directions; set aside.

Meanwhile, in a large skillet, heat oil over medium heat. Add ginger and garlic and sauté for 2 minutes. Add chicken and sauté for 5 minutes or until starting to brown. Stir in Bovril Liquid Chicken Bouillon and hot water. Sauté for 8 to 10 minutes or until chicken is no longer pink inside. Add green onions, napa cabbage (if using), carrots, peppers and chili sauce; sauté for about 3 minutes or until veggies are tender. Remove from heat.

Spread 1 tsp (5 mL) hoisin sauce down the center of each tortilla. Top each tortilla with one-quarter of the Knorr Sides Plus Vegetable Fried Rice and one-quarter of the chicken mixture.

Fold the bottom of the tortilla up two inches (5 cm), then fold in both sides to enclose filling. Enjoy hot or cold!


My Notes:

- Add a dollop of sour cream to your wrap if desired.

- I served fried mushrooms & garden salad as side dishes. These sides complimented the wraps perfectly!

P.S. ~ I will be posting the Recipe of the Week every Friday :)

Wednesday, January 6, 2010

How I manicure my finger nails

I've been told that when my finger nails are painted, it looks very 'neat' (as in tidy haha). I have never had a real manicure in my life, except for the one's I do to myself. I wouldn't say Im very vain, but I just can't paint my nails unless they're neat & tidy...I just can't!

Forgive me for the pic quality. I don't know why, but these items (including my nails) were the hardest things I've ever photographed.

This week I decided to paint my nails with "Opening Night" Nail Polish from Sephora ~ $12.00
This is a swatch from the sephora website (omg the link is working - yay!):


This is the bottle - it almost looks black without the flash:


So this is how my nails look like if I haven't painted them in awhile:

(I had to adjust the size of the pics so my hands may look a little distorted - pls disregard that)


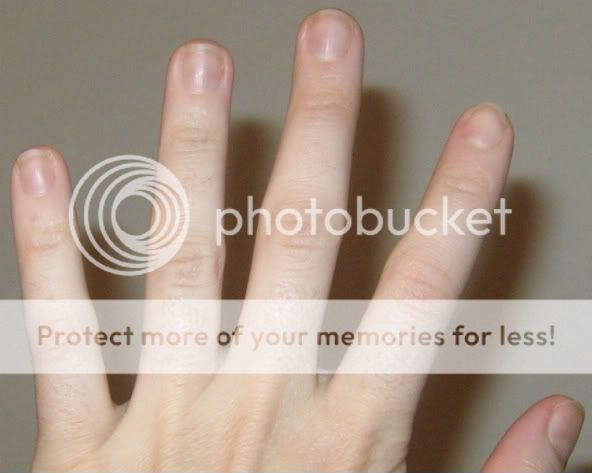
Sometimes I dont trim them evenly & I don't maintain the cuticles particularly well. They are just my regular nails. I don't like the feeling of fake nails.

Step One: Trim the cuticles

"Trimming" cuticles sounds gross to me, which is why I am very careful when I do it...I don't think they should be trimmed to often or too much because they grow in order to protect that area of our hands / nails (I don't have the full scientific explanation of the purpose of the cuticle but I might just look into that now). My cuticles used to grow very fast and a bit thicker than I wanted. I would only recommend trimming cuticles if there seems to be an overgrowth.

I use this cuticle trimmer. It was part of a gift package & I don't recall where it was from. However, I know they can be found in pharmacies & beauty supply stores.


Step Two: Shape the cuticles

I use the wooden shapers that were given to me as part of my gift. They work fine for me & believe they are very well priced. Again, these can be found in pharmacies & beauty supply stores.

I push gently on each cuticle to reach my desired curve.


Step Three: Trim the nails

I use a clipper to trim off any large sections of nail that I want to remove (usually the corners), so that I don't need to spend too much time with a file. The end result is usually a haphazardly looking nail. Don't worry - filing is next!

Step Four: File the nails

PLEASE recommend good files for me! I have yet to find a file that is worth buying!

I never use metal files. I just hate the feeling & the result I get from using them. I always use files like this:


I use medium roughness files for my nails, & at times fine roughness for touch ups. I believe this decision is best made based on the thickness of your nails. The thicker your nail, the rougher the file (I think).

I file as smooth & even of a curve of each nail as I can.

Step Five: Buff the nails

I always use a fine file to buff my nails. This should be quick & gentle. Mine are not naturally even, & they have some ridges. I believe this has something to do with the fact that I used to bite them A LOT! That is a habit I'm happy to say I stopped doing years ago!


Step Six: Scrub the nails

Grab a nail scrubber & go to town! I put any body wash soap on the scrubber, wet my hands & scrub away. My goal is to scrub off any residual nail "dust" from filing, as well as any residual unwanted cuticle.

Step Seven: Paint the nails ~ coat #1

Woohoo, getting closer to the finish line! Now when I paint my nails, it looks sloppy. I always go over the nail boundary and onto the skin when I paint them. The reason is that if you stay within the nail line, you will probably have some "blank" spots (unless you're a pro or just very gifted at this).

The smaller the finger nail, the less paint I put on the brush ( have tiny fingernails). If there is waay too much polish on the nail, it might develop little pools of polish on the sides of the nail that will never fully dry, & will actually chip off a lot faster than if you put less polish.

Ok brace yourself (I'm not usually quite this messy - but pretty close):

HA :P


Step Eight: Paint the nails ~ coat #2

When the first coat dries, I put a second coat of polish. I find that when I put a second coat, my nails look a lot more shiny & the polish looks more even.

Step Nine: Scrub the nails & fingers again

This is the last step! Before scrubbing your nails, be SURE that the polish is 100% dry. Otherwise, you're polish will come off or have marks on it.

The purpose for this scrubbing is to remove the polish that is on your skin around the nail, as well as the cuticle. I find that using a q-tip with nail polish remover will not give as much of a finishing look as simply scrubbing the stuff right off. You can also just let it fall off naturally but it will take longer. Washing your hair is another great way to get it off.

This is how my nails look after the residual polish has been removed:


And that is the final product! It might seem like a lot of work, but its actually quite relaxing & can easily be done right in front of the tv. There are many methods for giving oneself a manicure - and my method is admittedly very simple, low cost & doesn't involve any trendy chemicals or creams.
If you have any tips that could help my self-manicures improve, please let me know! Thanks for reading & I hope you enjoyed :)
P.S. ~ ohmygosh I don't want to forget to tell you that I stumbled upon my old blogs that I thought were no longer in existence! Check them out (there is a recipe on one that is totally delish!) Now I don't know if I should keep the old recipe blog & just post recipes there or what..that would make 3 blogs (eek):

Monday, January 4, 2010

Some orders of 'business' & randomness

So today is my first day back to school. Eeek! I'm excited & nervous at the same time! I'm taking a course called Sociology of Scientific Controversies & I'll be leaving the house soon to get some errands done before I head to campus. Finishing my degree is one of those goals I've had for a looong time. Well last term I said "enough is enough!" & I did what I had to do to get re-enrolled. Getting re-enrolled wasn't the problem - it was that in order to get enrolled again I had to pay off my university parking tickets (it was a bundle)..um ya..oops?
So I finally did it & now here I am, ready to go to school.

Tomorrow I get back to work too, so now I'm getting back to the grind & realizing that I need to buy a 2010 planner & get down to a neat schedule.
As far as blogging goes, I'm going to try to post on this one every Monday, Wednesday & Friday. I will try to post on my other one every Tuesday & Thursday.

I wanted to give a shout out to my new subscribers - omg it means so much to me that you actually read what I write! :) Sami, you asked for a skating picture & although I don't have one of myself - here's one of the public rink at Nathan Phillips Square:


Anyway I've got a couple of ideas coming for both blogs & I must say that it has become such a motivator for me. On Wednesday I'll be posting my 'manicure' routine with a pic of my nails before & after...nothing fancy at all.

If you have any suggestions, please let me know! Now time to get ready for school - wish me luck! :)

Sunday, January 3, 2010

Exercise 'Resolution'

I'm not a big workout junky. I love exercising, but I prefer to exercise while doing something productive rather than just walking on a treadmill. My 'resolutions' for excercise are what I have always resolved to do & have mildy taken part in, in the past. However 2010 is about really really going there & doing the things that I know will impact my health in a positive way.

On the first day of the new year, I fulfilled a wish I've had for many years - to visit a Hindu Temple! Two Hindu friends of mine invited me over, dressed me up & prepared me for many fascinated stares (I stood out like a sore thumb). We entered the temple, took off our shoes, & walked into what appeared to me as a great big, massive room with people sitting, standing, praying, talking & wandering about. It was not at all what I expected. As my eyes followed the sound of a chanting priest, I noticed that there were several smaller temples inside. We approached the temple that had a large group huddled around it & watched the priest enter the temple (forbidden to anyone else). He performed many ceremonies, mostly involving fruit offerings, and moved on. I then followed my friends around to each temple & pretty much did what they did! It was a very interesting, educational & spiritual experience. I'm very grateful for having this opportunity & I hope to go again!

Yesterday I really started getting into my physical health kick by grabbing my ice skates & convincing my boyfriend to walk to the subway station. It was -30 Celcius with the wind chill so I think we put the "craze" in "Crazy" (does that joke make sense?). I tried several times to jump a fence while my boyfriend egged me on, but to no avail (I ended up walking around the fence & faced my laughing boyfriend on the other side). The entire walk probably took about 45 minutes. Then we walked for about 10 minutes from the subway station to the ice rink. We skated for awhile (maybe 2 hours? We lost track of time!) & then did a whole lot of walking before we hopped back on the subway & headed home. That felt like a great success.

The only downer to the whole experience (and I can't believe I'm admitting this), is that someone said something really hurtful to me on that day. It definitely put a damper on it. As important as it is to not let hurtful things get to you, it can be really difficult when you're already going through a rough time. Let's put it this way - I looked like hell. I've been sicker than ever in my life & it has made me look tired. Tired tired tired & old. Seriously. No matter how much you do with beauty products, if you are under extremely stressful circumstances for a long period of time without a single break - it will start to show. Trust me. It takes a lot, but it will show. And its showing on me. I look like a different person than I did a year ago. I know I'll bounce back someday but I really feel like I've aged 10 years in just 1. So someone said something about my appearance (I was not wearing a single scrap of makeup so that's why I looked like such crap). What's so sad about it is not that I look like hell, but that some punk (& believe me I could have a field day about his appearance) made an assumption about me & put energy into being mean for the hell of it. So the moral of this story is: never, NEVER - make assumptions about people. You never know what they are going through or how they got to where they are now or why they seem the way they seem. Enough said. Sorry about the rant. I just hope that people will learn to have some compassion for others by reading this, & that people who have been judged by their appearance will know that all that matters is how you feel.

Anyway, I can only control my actions & I can say confidently that I'm moving full force into becoming a more healthy person in 2010.

If anyone wants to share their health tips or goals, please do in the comments below!

Oh and P.S. ~ A great way to excercise is to clean! Thinking of cleaning the house in that way makes it feel a lot less boring!

And P.S.S ~ Thanks Christine for the add! A big shout out to my friend Christine - we should get together again soon!

Saturday, January 2, 2010

Pier One ~ Post-Christmas Haul

On the way back from my ice skating trip today (way to go excercise!), we passed Pier 1 Imports & I am a total fan so I just had to go in & check out the Christmas decor sales! I decided not to buy much because we were taking the subway back & already were bogged down by our ice skates & other necessities.

I couldn't find the items online but the websites for Pier 1 Imports are:

www.pier1.com (US)
www.pier1.ca (Canada)

I bought 4 items on sale & am very happy with them:

Glitter Star ~ Reg. $18.00 cdn, Sale. $8.98 cdn (there is a front-angle pic of the glitter star just 2 pics below this one - I don't know how the pics got shuffled - sorry!).

Anyway I decided to make a go at turning this star into a little magazine rack for the bathroom. I'll see how that works out. This is a pic of my attempt. It fits in with the bathroom decor really nicely.


These are so cute & I'm so excited to use them next year:

Gift Box Table Confetti ~ Reg. $3.95 cdn, Sale. $1.88 cdn (Left)
Sequin Balls Table Confetti ~ Reg. $4.95 cdn, Sale. $2.38 cdn (Right)


The wandering pic of the Glitter Star (details above). This is the front of it.


Tree Garland ~ Reg. $23.95 cdn, Sale. $11.88 cdn (I think I still overpaid for these as I forgot to check for the price!)


Here is the garland in the box:


In total after taxes I paid $28.39, so I think I got a decent deal considering the quality of what I got (and the joy I felt being in Pier 1!)

Hope you enjoyed!

As an aside:

I'm not sure why, but no matter how I upload my pics, they always post in the wrong order. Can anyone let me know how to post pics in the order that I want them to be posted? Its soo annoying & I haven't been able to figure it out yet!

The other question I have is how to replace links with words, so that the entire website does not show up. I can't figure that out either!

I'm a total rookie so any help would be greatly appreciated. Thanks!

Friday, January 1, 2010

Product Review ~ Radox Herbal Bath Salts


Hi everyone, I hope you had a wonderful New Year's Eve celebration!

I'm starting off the new year by doing a product review on something that I totally loooove using after a hard day at work or if I simply want a super relaxing experience.

I am definitely a 'shower' kind of person but once in awhile I like to have a good bath to relax in while reading a book or just recouperating from a long day.

I first recieved a box of Radox Bath Salts as part of a gift that my mother put together as a care package for me when I was a student. I read the instructions (just pour suggested amount under running bath water) & went for it. It turned the water a pretty colour & smelled delish. When I went in the tub, it was so soothing. In all honesty, it is the only bath product I've ever used (and I've used many bath products!) that has a physical effect on me. My muscles completely relax after a few moments of sitting in a tub of bath salt infused water.

Storage Tip:
When not in use, place the package in a ziplock bag. When the package is moved or picked up, some of the powder can come out of the opening. If/when powder gets into the ziplock bag, I simply pour it into my next bath.

So I definitely recommend this product.

If you have any questions or feedback, please enter in the comments below!