Forgive me for the pic quality. I don't know why, but these items (including my nails) were the hardest things I've ever photographed.
This week I decided to paint my nails with "Opening Night" Nail Polish from Sephora ~ $12.00
This is a swatch from the sephora website (omg the link is working - yay!):

This is the bottle - it almost looks black without the flash:

So this is how my nails look like if I haven't painted them in awhile:
(I had to adjust the size of the pics so my hands may look a little distorted - pls disregard that)
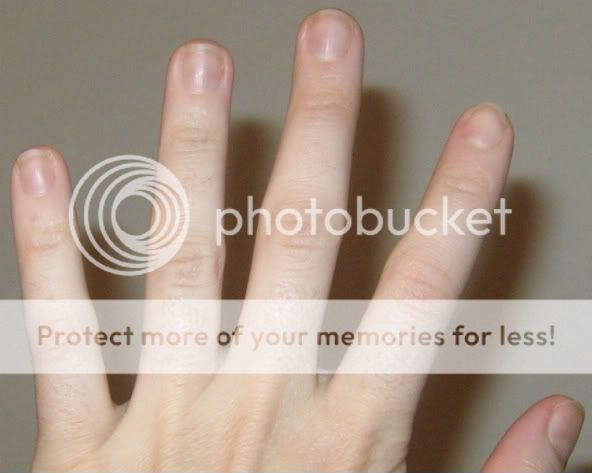
Sometimes I dont trim them evenly & I don't maintain the cuticles particularly well. They are just my regular nails. I don't like the feeling of fake nails.
Step One: Trim the cuticles
"Trimming" cuticles sounds gross to me, which is why I am very careful when I do it...I don't think they should be trimmed to often or too much because they grow in order to protect that area of our hands / nails (I don't have the full scientific explanation of the purpose of the cuticle but I might just look into that now). My cuticles used to grow very fast and a bit thicker than I wanted. I would only recommend trimming cuticles if there seems to be an overgrowth.
I use this cuticle trimmer. It was part of a gift package & I don't recall where it was from. However, I know they can be found in pharmacies & beauty supply stores.

Step Two: Shape the cuticles
I use the wooden shapers that were given to me as part of my gift. They work fine for me & believe they are very well priced. Again, these can be found in pharmacies & beauty supply stores.
I push gently on each cuticle to reach my desired curve.

Step Three: Trim the nails
I use a clipper to trim off any large sections of nail that I want to remove (usually the corners), so that I don't need to spend too much time with a file. The end result is usually a haphazardly looking nail. Don't worry - filing is next!
Step Four: File the nails
PLEASE recommend good files for me! I have yet to find a file that is worth buying!
I never use metal files. I just hate the feeling & the result I get from using them. I always use files like this:

I use medium roughness files for my nails, & at times fine roughness for touch ups. I believe this decision is best made based on the thickness of your nails. The thicker your nail, the rougher the file (I think).
I file as smooth & even of a curve of each nail as I can.
Step Five: Buff the nails
I always use a fine file to buff my nails. This should be quick & gentle. Mine are not naturally even, & they have some ridges. I believe this has something to do with the fact that I used to bite them A LOT! That is a habit I'm happy to say I stopped doing years ago!

Step Six: Scrub the nails
Grab a nail scrubber & go to town! I put any body wash soap on the scrubber, wet my hands & scrub away. My goal is to scrub off any residual nail "dust" from filing, as well as any residual unwanted cuticle.
Step Seven: Paint the nails ~ coat #1
Woohoo, getting closer to the finish line! Now when I paint my nails, it looks sloppy. I always go over the nail boundary and onto the skin when I paint them. The reason is that if you stay within the nail line, you will probably have some "blank" spots (unless you're a pro or just very gifted at this).
The smaller the finger nail, the less paint I put on the brush ( have tiny fingernails). If there is waay too much polish on the nail, it might develop little pools of polish on the sides of the nail that will never fully dry, & will actually chip off a lot faster than if you put less polish.
Ok brace yourself (I'm not usually quite this messy - but pretty close):
HA :P

Step Eight: Paint the nails ~ coat #2
When the first coat dries, I put a second coat of polish. I find that when I put a second coat, my nails look a lot more shiny & the polish looks more even.
Step Nine: Scrub the nails & fingers again
This is the last step! Before scrubbing your nails, be SURE that the polish is 100% dry. Otherwise, you're polish will come off or have marks on it.
The purpose for this scrubbing is to remove the polish that is on your skin around the nail, as well as the cuticle. I find that using a q-tip with nail polish remover will not give as much of a finishing look as simply scrubbing the stuff right off. You can also just let it fall off naturally but it will take longer. Washing your hair is another great way to get it off.
This is how my nails look after the residual polish has been removed:


And that is the final product! It might seem like a lot of work, but its actually quite relaxing & can easily be done right in front of the tv. There are many methods for giving oneself a manicure - and my method is admittedly very simple, low cost & doesn't involve any trendy chemicals or creams.
If you have any tips that could help my self-manicures improve, please let me know! Thanks for reading & I hope you enjoyed :)
P.S. ~ ohmygosh I don't want to forget to tell you that I stumbled upon my old blogs that I thought were no longer in existence! Check them out (there is a recipe on one that is totally delish!) Now I don't know if I should keep the old recipe blog & just post recipes there or what..that would make 3 blogs (eek):
http://www.mymantram.blogspot.com/ (try the recipe!)








 Posts
Posts


